For credentials, please reach out to your pkgPlace contact. This person will set you up with a username, using your email, and a password. Your password can then be changed.
<insert link>
Android
Click on the icon below.
For credentials, please reach out to your pkgPlace contact. This person will set you up with a username, using your email, and a password. Your password can then be changed.
<insert link>
Create an auction
‘Create auction‘ is the location for the items and lots. Once the auction is ready, it can be uploaded to HiBid for an upcoming auction.
To start, make sure ‘Auctions‘ is selected in the bottom icon bar, then click on the ‘+‘ in the top right corner. Here you can populate details specific to the upcoming auction.
Click ‘Submit‘ to complete the process.
Manage stock images uploaded
On the bottom toolbar, select ‘Settings‘. Select ‘Lot Stock Image Export Limit‘. Select the number of images to upload. This is the maximum preferred. Select ‘Save‘.
Add details to new items / lots
The fastest and easiest way to create lots.
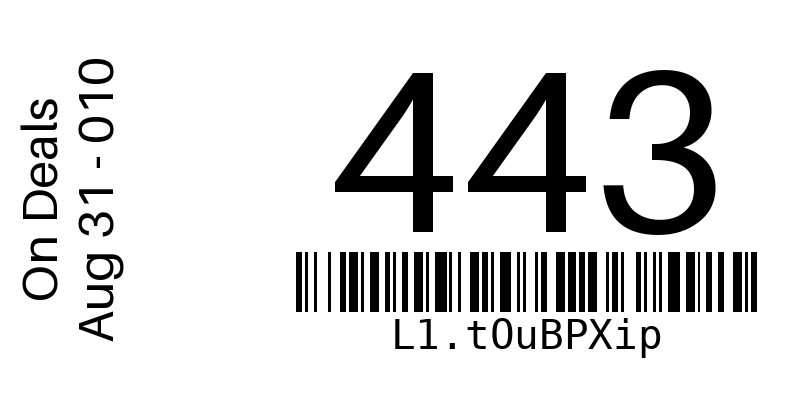
Click on the ‘cataloging‘ icon in the lower toolbar. This opens the scanner in ‘cataloging’ mode. Scan the lot label (previously created).
Once the lot label is scanned, you will be directed immediately to the items.
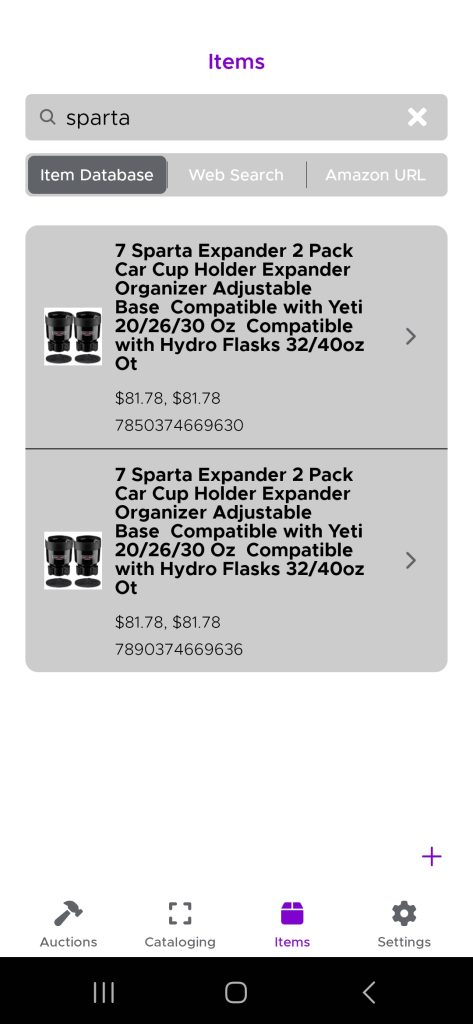
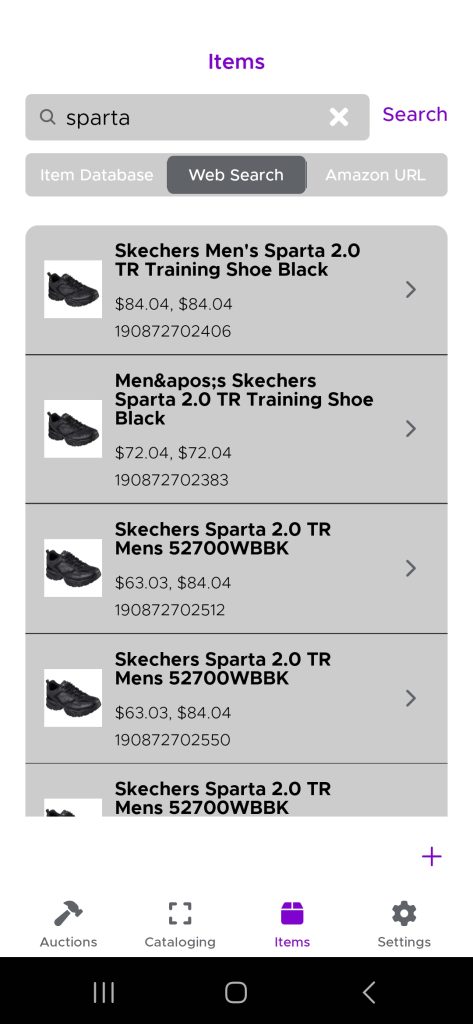
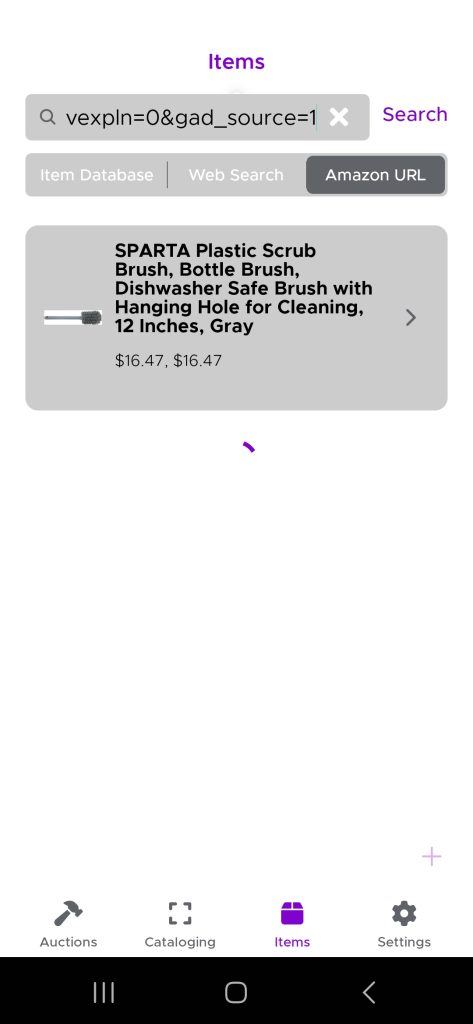
There are four ways to populate the needed information.
Scanning – on the right side of the search bar, touch the ‘scan icon’ to open a scanner used to scan the barcode of the item. This is usually the easiest way to find the information the cataloger is looking for.
Item Database – search a database of all items cataloged since your auction has been using the app.
Web Search – similar to a Google search, enter a few key words (ie. Yeti 32 oz) to capture the information from the internet.
Amazon URL – here you can use a lens or search in Amazon to find the item information. Copy the link and paste it into the search bar to access this item information.
You will be directed to the ‘Create Entry’ screen. Populate any additional information, such as images (by touching the arrow), condition (by selecting the best option), and location ID (the shelf location where the item will be).
Select ‘Submit‘ if it is a new item or ‘Save‘ if editing. The lot is created.
Add details to images
Export an auction
To export an auction for import into HiBid or other auction listing sites, a few steps are needed.
Select ‘Auctions’ on the bottom toolbar.
Select the auction to be exported.
in the top right corner, select the ‘i’.
On the bottom toolbar, select the ‘Export’ button.
A notification will popup notifying you that your auction has been successfully exported. Please visit your email inbox for the file.
Lot Creation
Create blank lots with labels
Once an auction is created, the next step is to create lots. We have a very easy way to create lots and labels at the same time.
Start by selecting ‘Cataloging‘ from the icons in the toolbar at the bottom of the screen.
Then in the top left corner, select the ‘+‘ icon. Add the date and title of the auction. Select the number of labels required (max of 250 at a time).
Once all the information has been completed, select ‘submit‘. A .PDF file will be emailed to the user’s email. The labels are created in a 4×2 thermal label format.
The next step is to add the details to the newly created lots.
Create blank lots without labels
Add details to new items / lots
The fastest and easiest way to create lots.
Click on the ‘cataloging‘ icon in the lower toolbar. This opens the scanner in ‘cataloging’ mode. Scan the lot label (previously created).
Once the lot label is scanned, you will be directed immediately to the items.
There are four ways to populate the needed information.
Scanning – on the right side of the search bar, touch the ‘scan icon’ to open a scanner used to scan the barcode of the item. This is usually the easiest way to find the information the cataloger is looking for.
Item Database – search a database of all items cataloged since your auction has been using the app.
Web Search – similar to a Google search, enter a few key words (ie. Yeti 32 oz) to capture the information from the internet.
Amazon URL – here you can use a lens or search in Amazon to find the item information. Copy the link and paste it into the search bar to access this item information.
You will be directed to the ‘Create Entry’ screen. Populate any additional information, such as images (by touching the arrow), condition (by selecting the best option), and location ID (the shelf location where the item will be).
Select ‘Submit‘ if it is a new item or ‘Save‘ if editing. The lot is created.
Add details to images
Advanced Features
MSRP threshold
Edit item / lot details
The best way to edit an existing lot is to scan the barcode.
Alternatively, if the auction location is known, select ‘Auctions‘ and then select the auction.
If the item is in the general item catalog, select ‘Items‘ from the bottom toolbar. Then select ‘Item Database‘ and start typing the some details on what you are looking for into the search bar.
Export an auction
To export an auction for import into HiBid or other auction listing sites, a few steps are needed.
Select ‘Auctions’ on the bottom toolbar.
Select the auction to be exported.
in the top right corner, select the ‘i’.
On the bottom toolbar, select the ‘Export’ button.
A notification will popup notifying you that your auction has been successfully exported. Please visit your email inbox for the file.
Employee dashboard
Team mangement
Final Step
Export an auction
To export an auction for import into HiBid or other auction listing sites, a few steps are needed.
Select ‘Auctions’ on the bottom toolbar.
Select the auction to be exported.
in the top right corner, select the ‘i’.
On the bottom toolbar, select the ‘Export’ button.
A notification will popup notifying you that your auction has been successfully exported. Please visit your email inbox for the file.
Warehouse & Delivery
post-auction tutorial
Setting up your auction
Step 1 - Logging in and setting preferences
Here you will be able to get yourself logged into AuctionPro Warehouse software.
Turtorial
Step 2 - Initial setup (delivery lots and notifications)
Before your get started, update your winning bid notification and customer invoices, Create a ‘Delivery’ lot, add images to your lot and create a website banner, and update your Terms and Conditions. The following will help you set up your business to notify your customers of the pkgPlace partnership.
Step 1 - Update your winning bid notification AND invoice
NEW – pkgPlace helps your customers schedule a time to pick up of their items from your facility and NOW ours. And of course, we still deliver to the customer’s door.
If you do not want to use our free scheduler for customers to schedule a pick up at your warehouse, then use the following information in the winning bid notification email that is sent to your customers.
Don’t forget to include it in the bottom of your invoice.
If you wish to use our complimentary scheduler to organize pick ups from your warehouse with the pkgPlace delivery and depot services then add the following to your winning bid notification email. Make sure you edit it to add your auction in the link.
To schedule a pickup at our warehouse or request a delivery from pkgPlace (which includes using the pkgPlace pickup depot), visit https://app.pkgplace.com/ah/<enter your action name as it is in pkgPlace>.
Step 2 - Create a 'Delivery' Lot
Lead Delivery or pick up depot with pkgPlace.
Description Request a pick up at a pkgPlace depot or enjoy delivery to your door with www.pkgplace.com.
Payment is made directly to pkgPlace AFTER the items are picked up.
More information can be found at www.pkgplace.com.
<insert auction house> is not responsible for items once they have left our warehouse.
Add the images below to improve your lots.
Step 3- add a Website Banner
Include this banner on your website and hyperlink to www.pkgplace.com to make life easier for your customers.
Step 4 - update your Terms and Conditions
It is the responsibility of the bidder to sign up for delivery with pkgPlace directly and to understand their terms and conditions prior to requesting the delivery. We don’t release the items for delivery until the items have been paid for in full. We are not responsible for any items after it is released from the warehouse to pkgPlace. Payment is made directly to pkgPlace.
Step 3 - Uploading your completed auction from HiBid
This section will guide you through the steps to add an auction to the pkgPlace auction view. Used properly, the pkgPlace app will help the warehouse run smoother and without the need for paper.
Upload completed auction from HiBid
Download the Auction from HiBid
Visit HiBid and on the main page, select ‘Lot Status‘, which is found in the center button on the bottom toolbar.
Now select ‘Export‘.
Your report will open in an .XLS (Excel spreadsheet)
Save the report in a location (ie. desktop) where you will be able to quickly access it for the next steps.
Upload the Auction to pkgPlace
Open up https://app.pkgplace.com/auction-house
Enter your username and password if required
Click on the ‘Auction‘ tab on the left column
Click on the green ‘UPLOAD INVOICES‘ button and a popup will open
With the popup open, enter the auction title (or just the number), the auction close date, and the file created in Step 1 above
Only after the file has been selected, click on the blue ‘UPLOAD‘ button
A new row should be created with the information
Click anywhere on the row to verify if the data looks good and all columns are populated.
Congratulations!! Your items and invoices are cataloged.
managing your auction
Shelf management: Use QR codes and labels to organize bins and pallets
Use the labels for Shelves, Bins, Pallets, and any other area where you keep items. Our shelf management is fully integrated into the cataloging app.
Simply scan the shelf and the items as you put them onto the shelf and this information follows the item until it is pulled off the shelf. Our labels are scannable with QR codes and the big clear labels make it easy to identify the shelf.
Tutorial
Adding items to shelf locations - manual
Some auction houses catalog the Lots to make them easier to find when picking invoices. To catalogs items after the auction close date, is to keep your items organized for everyone until delivered to the customer.
Tutorial
Picking Options: Use the Digital Pick List (mobile) or Paper Pick List (thermal)
Verification: Digital signatures and shelf location mapping
preparing items for delivery
Pickup Workflows: Managing scheduled, unscheduled, and pkgPlace pickups.
Please note there will be additional charges for brokerage and government fees applied by UPS to the delivery. These fees are not related to pkgPlace.
Due to new tariff regulations, especially on products made in China, many items are no longer duty-free. These policies are set by your country’s customs authority, and we recommend staying updated on applicable import duties and taxes through official government sources prior to booking any shipment with pkgPlace.
We understand this can be frustrating, but it’s part of the import process and applies to all packages entering the country under these conditions.
TVs, MONOTORS AND OTHER BREAKABLES
In most situations, customers are purchasing returned merchandise. This means these items are handled numerous times along the way. Although some auctions do test items, it is impossible to properly test all. Due to these complications and with the limited original packaging, we are no longer offering insurance on these items. These items are shipped at shipper’s risk. Please visit our terms and conditions for more information on this. http://pkgplace.com/privacy-policy/#terms
NON PAYMENT
Payment is due upon receipt. Any item(s) associated with an unpaid invoice will be considered abandoned if full payment is not received within seven (7) calendar days of the invoice date.